Wednesday 11 June 2014

Post Production Review

Editing Review

Technology

So to edit my film I used Premiere Pro CS6 which was the editing software that I created the edit project on for some of the text like the title of the film I used Photoshop CS6 and the main reason I used this was just to have more options to mess around with the fonts abit more like colour fill and any other options just have something different over the vanilla versions of the fonts.   


Process and Tools

Throughout the edit process I noticed multiple problems with the clips like a boom mic at the side or top or a member of the crew slightly in shot so I used just a simple and quick fix and that was to slightly enlarge the clip making sure that the overall quality of the clip wasn’t ruined and that the problem was fixed. Some of the transition that I originally wanted just didn’t suit the style of the film so I went with a page peel that while might seem tacky, but perfectly suits the cheesy style of the film.  Throughout the edit I was adjusting sound levels using the audio gain tool for whether dialogue was being drowned out by the sound track or the sound levels were reach abnormal levels and would distort so I had to watch the film multiple times making sure that sound levels were just right and didn’t cause any problems once burnt onto a DVD. Because of what the film was which is a sort of small scale super hero movie I wanted some of the classic screen pop ins like POW and ZAP so I used Photoshop to get rid of the background of some images that had these small graphics to then import to the edit project and then add to the films timeline.

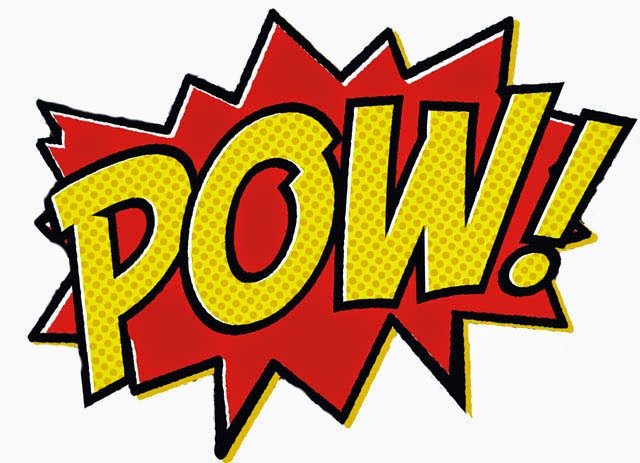
This was one of the images that I used for the film but first I had to crop the white that was sorrounding the actual graphic before putting it in the film
 
 
Quality
Overall I think the quality of the edit is hit and miss some things turned out well but others like the opening title seem boring and rushed which is why I have created another version of the film I also noticed once the film was burned onto DVD that the sound was different to how it was in the edit project sometimes sound effect were way too loud and others like the sound track were not even noticeable in the film. Throughout the process I have learned some new tools and methods like simply enlarging a clip to get rid of any small mishaps to the sides of the clips I’ve learnt that you don’t truly know what the finished film will be like until you get it on a DVD and on a big screen so I have to pay more attention and look out for any mistakes. I would say sometimes that edit came out well like adding sound effects that add to the cheesy factor that the film has going for it and sometimes the soundtrack would line up perfectly to what you were seeing on screen like when the film ends the sound track hits a real high note when the screen goes to black before the credits but overall I am a little disappointed which is the reason for the newer version with a higher attention to sound, detail and better opening.

In This image you can see one of our crew memebers getting ready to throw the comic book at the right side of the screen this is one of the moments when I enlarged the clip.

Once enlarged the hand at the side was no longer visible.

Issues I had with footage
Most of the issues that I encountered were bad framing with the camera so I had to re size the clips sometimes if the issues were at the side although sometimes adding the cinema scope helped when we had a boom mic problem in some clips.

Audio levels were very different from one another in each clip so I had to keep adjusting the audio levels throughout the edit making sure it didnt become to low or high and that it stayed more or less the same through the film
In this scene one of our actors has to shout but the soundtrack was louder than this so I made the clip slightly louder to reach -6 on the sound scale and then lower the audio level on the soundtrack. This helped balance the scene out sound wise.


Preparing for Editing

Preparing for Editing

There were some tasks that we were set out to do before we could film and edit to prepare for when we had to edit.

The first we were told to do is to stripe the tapes before we started filming and what this means is to put the tape in the camera and set it to record, we don’t actually record with the tape we kept the cap on the camera and we also turned audio recording off and let the tape record all the way to the end (1hr). If we do not stripe tapes then we might not get correct times codes displayed on the camera when we are filming which would cause many complications in production like recording over footage or not knowing how much footage was actually recorded beacuse the timing wouldnt be accurate .

Labelling our tapes was another important thing so that we know exactly what footage we were capturing, scenes, shoot day whatever information we needed to help sort out the footage we had got.

How the footage was captured and setting up our edit project

So getting the footage of the tape means setting up a project and sending the footage into a folder specifically for the footage.  So we would need a camera and a fire wire cable and to have our project open.

What an edit decision list is and how it can be used

An edit decision list helps us when in the edit to decide what footage we can use and what footage we should avoid like if a scene didn’t come out to plan and the footage was un useable we would put that in a bin and this would help keep things organised, but it isn’t just about what footage shouldn’t be used it’s also about what footage we must keep like if a scene was so crucial to the story we would have to keep that in the film no matter what. This helps us streamline our decisions when deciding what clips to use.

How footage was assessed

So once we captured our footage and had imported them into our edit project we watched all of the clips we had gathered looking for any faults and outtakes and to help keep track of any footage that wasn’t usable we created a bin in our project to place that footage in, any clips that could be saved we just wrote down that clip name, bin name and what the fault with the fault was.

How we organised our edit project

We the large number of clips to look through it would have been a pain to look for a specific scene or specific shoot day so to organise the footage into a more manageable form we created bins or folders, this allowed us to organise the footage anyway we wanted, as a team we choose to go with the date just because we knew what scenes we filmed on what day but other sorting methods could have been used.

Wednesday 18 December 2013

The Development of Editing

The Principles of Editing

How the very first films were edited

The first films in the early 1900's were all shot in camera meaning that there was no editing involved it was just one reel which means the audience would have seen the film in the order it was shot in. Which compared to these days would seem like a very daunting task to take on.


The great train robbery was a western film made in 1903 and is considered the milestone of film making it was 12 minutes long and written, directed and produced by Edwin S. Porter when this film came out it used a number of new and very innovative techniques to the film industry at the time this film contained cross cutting, double exposure composite editing , camera movement and on location shooting. These reasons are why this film is considered as a milestone in the film making industry.

Cross cut for the time this was made were a very sophisticated method of editing although these techniques were not original to the great train robbery there is a lot of emphasis on this film because of the masterful execution of these methods.

David Griffiths is considered a legend in the film making industry because of his experimental and also innovative work with editing he invented the parallel editing technique and then taking it to the next level with each film he made taking it to and impressive amount of depth and polish.

Editing in the early days was a lot more physical having to actually cut the tapes of a film then attach them back together to create a edit. This was all physical and a lot more work to create an edit also things werent able to be as impressive compared to todays editing software.

As we move on to the digital era of editing we see massive jumps in the speed an editor is able to create and complete an impressive edit due to the ease of use of editing software.

Starting in the late 70's to the early 80's some equipment was introduced including Time base correctors and digital video effects unit and they used a standard analog, and this composed the video this made it much easier to correct or enhance the video.

Linear Vs Non-Linear

In the early days of electronic video production linear editing was the only way to edit tapes but when it came to the 90's non-linear editing became possible with non-linear editing computers and with it editing became more flexible and powerful.

Non-Linear editing at first wasn't welcomed among people and many editors ignored Non-linear methods mainly because at first non-linear editing computers were cramped with performance issues but because of the many advantages that came with non-linear editing editors could no longer ignore it.

Parallel Editing


Parallel editing also known as cross cutting in it's basic description means that there is more than one story line happening at once in different locations a good example of this would be the godfather in the scene were one of the characters is at the church watching his child being baptized but then the men in his mafia are killing everybody that he has told them to kill and these both occur at the same time making it parallel.
God Father Scene https://www.youtube.com/watch?v=2Zs61pakiIY This means that a film can have very different moods between cuts in the godfather we are seing voilence and bloodhsed but then it cuts to a much more slow and calm scene of a child being baptized.

Once again the example for this is going to be Edwin S. Porters The great train robbery which was the first film to use cross cutting. also another good example of parallel editing would be D W Griffith's Birth of Nation https://www.youtube.com/watch?v=k57rt58vUYw

Montage Editing

Montage is a French word that means putting together and montage editing is to get a series of clips and then edit them together to create a whole one section instead of them staying as separate clips and example of this would be the Odessa steps scene in the film Battleship Potemkin http://www.youtube.com/watch?v=DLEE2UL_N7Q even a cereal advert has mimicked this film and the same part of it too https://www.youtube.com/watch?v=n8up-pJGqYo  or another good example and probably the most known is the training montage in the film Rocky http://www.youtube.com/watch?v=XTN4Y35JkmE

With editing editors can alter time and space with the editing techniques that are used today alot of information was used from the documentary Cutting Edge: https://www.youtube.com/watch?v=Jo14zQtMbpg&list=PLB530DBFAB795D20A

Point of View Shot

A point of view shot is where the camera is showing what the person its following see pretty much a first person perspective this can be used to add suspense in something like a thriller or a horror if some other character is sneaking up behind another character. https://www.youtube.com/watch?v=ovQk7fd4_Co